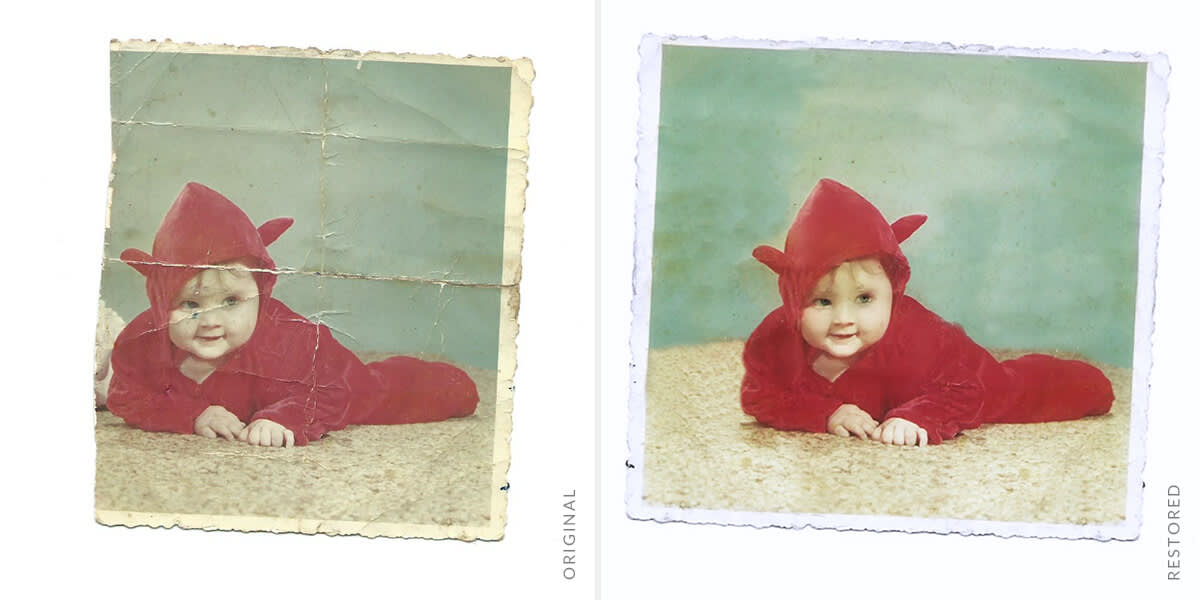
There’s something extra special about looking at family photos from back in the day. Isn’t it a bummer when they’re all torn, faded, and damaged? Well, we have some phenomenal news for you: you can fix ’em up with PicMonkey. Preserve your precious photos and say goodbye to creases, cracks, rips, and water damage. Old photo restoration is a quick and fun process.
First thing first: Scan your photos
To get started with your old photo restoration, you’ll want to scan your pictures into a computer. If it’s a PDF, remember to convert it to a JPEG. When it’s ready freddy, drag it onto PicMonkey’s homepage to open it.
For frayed or torn edges—Duplicate and rotate
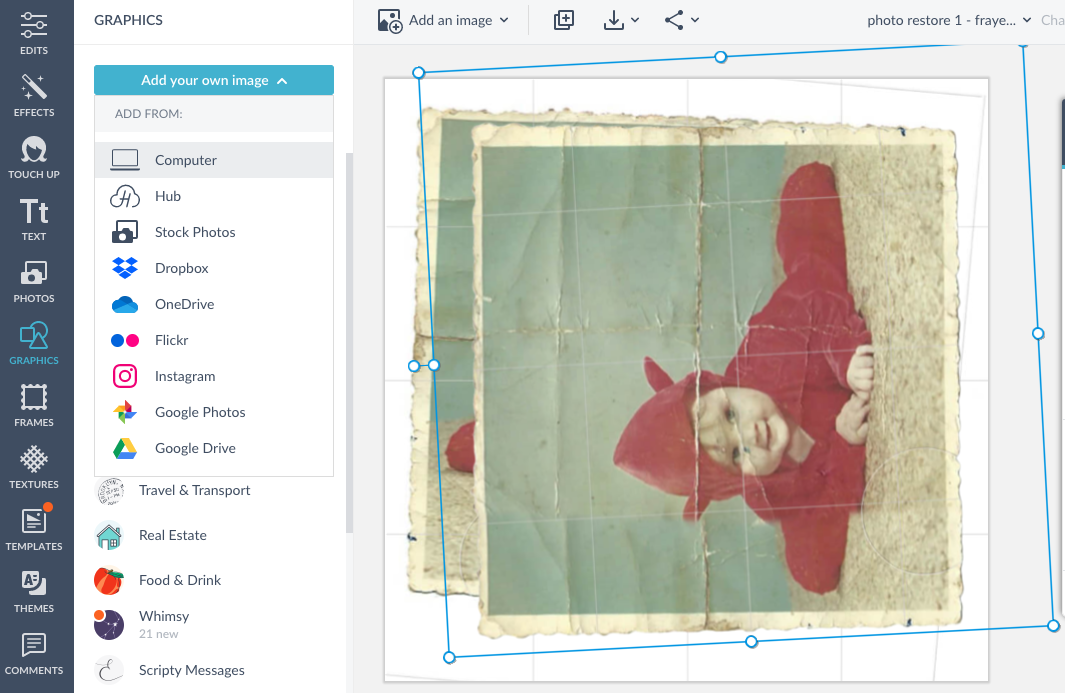
Is the photo you love looking a little rough around the edges? Maybe a piece is torn off or it’s looking a little frayed? One simple fix is to open your image in the Editor, duplicate it, then rotate the image to use the better-looking side to patch up the torn or missing side. Last, use the eraser on the Graphic palette (under Effects) to remove the parts of the duplicated pic you don't need.
For wrinkles or rips—Use the Clone tool to repair

Clone is everything when it comes to restoring photos. It can help you remove a scratch by painting over it with pixels from an undamaged part of your image: just select a part of the photo that is in good condition and spread the love. Move the dotted circle (your source, or, the starting point for your clone-a-thon) to the part you’d like to clone, click, and then use your cursor (the solid circle) to paint over those less-than-stellar areas.
“Whoa, why can I still see the dotted circle?” That’s the tool showing you where you’re cloning from! Clone is dynamic, which means that as you move your cursor, the area being copied moves with you.
For faded skin and eye color—Use Touch-up tools

Touch Up is an uuuber important part of adding color and life to your faded image. Eye Brighten puts back the light in your eyes along with enhancing the color. And adding some Spray Tan doesn’t necessarily mean your subject is suddenly Oompa Loompa orange. (Unless you want them to be, of course.) But applying a tan on your subject—and lowering the intensity— can make their skin look less faded. Try it out!
For adding polish—Apply photo effect filters
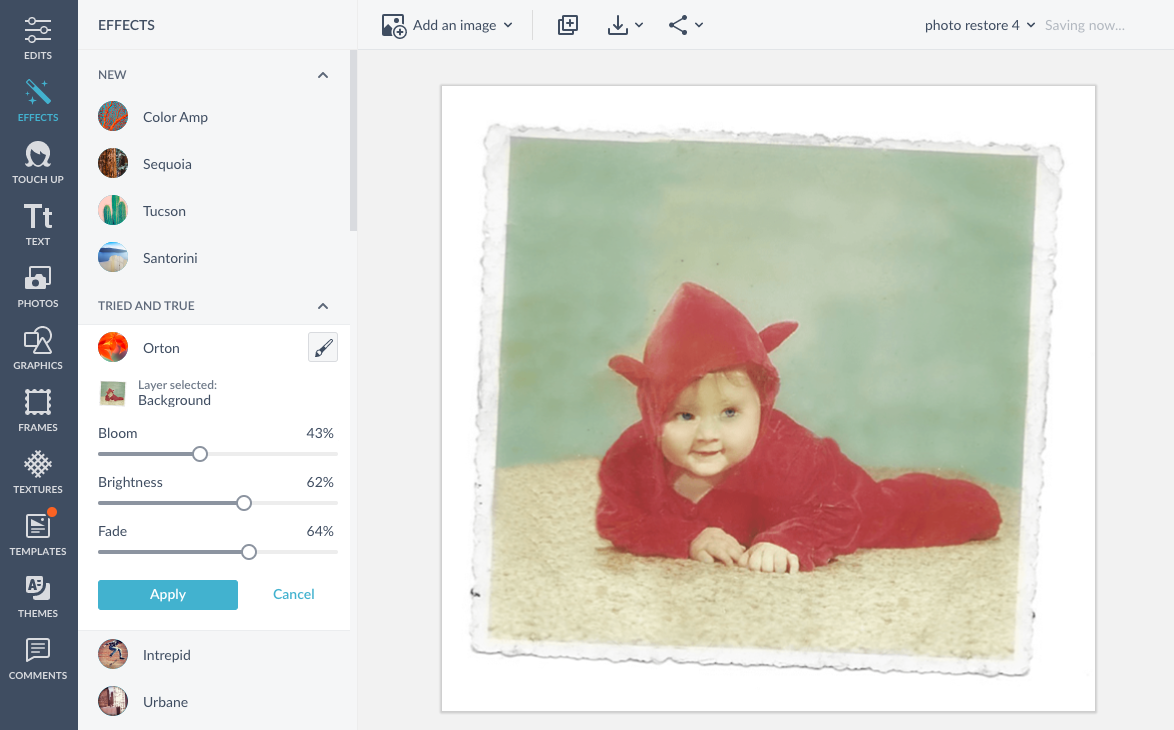
PicMonkey Photo Effects add a nice touch to all photos—even vintage ones! When you’re done editing out scratches and bends, head over to Effects and pick one that you like. You can apply multiple effects if you wish—it’s actually encouraged. And remember, play around with the Fade slider until your effect looks juuuust right.
Tip: If your photo’s got a faded border, one easy fix is to open a black and white effect, paint it off the border and then click Reverse effect so that it’s only applied to the border.
For color correction—Use Curves and Colors
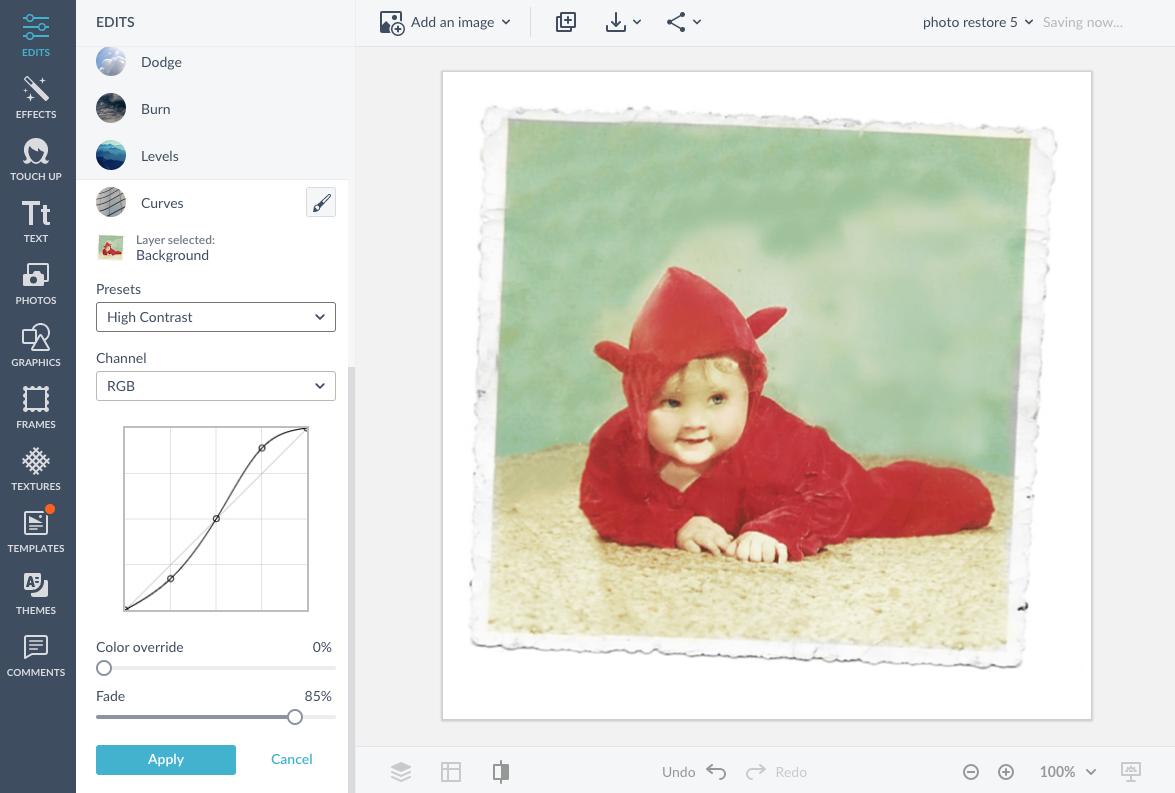
Photo seen a little too much sun? Not to worry! Use the Curves tool to subtly pull up highlights and pull down shadows, correcting the overall exposure of your image.
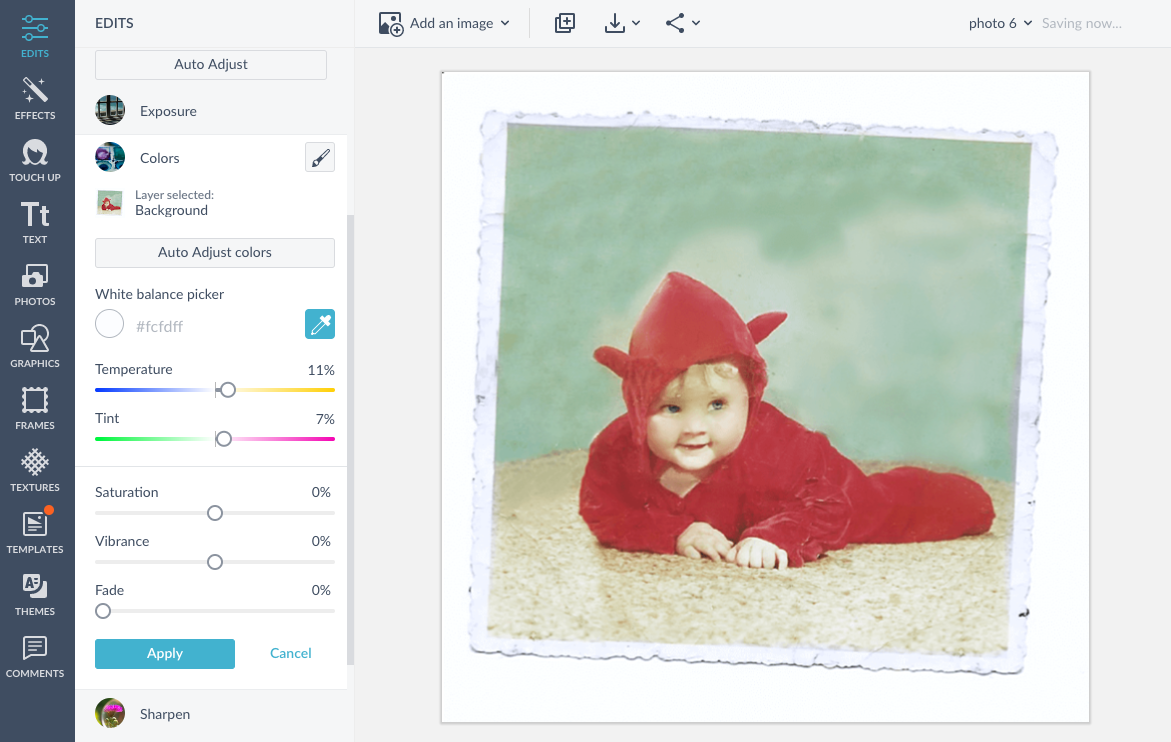
Plus, if the colors themselves are a little wonky, try using the Auto-adjust button in the Colors tool to instantly fix saturation and temperature.
Explore what else you can do in PicMonkey: use our reshape photo tools, make a color splash image, or get fresh ideas for your Instagram backgrounds!
